Showing posts with label Rudders. Show all posts

Friday, May 3, 2013

Port Rudder -- 234hrs

Today some pictures, found the camera:) I picked the port rudder to work on today since I had been working on the port stern post. It needed the trailing edge shaped to improve water flow across, then I tackled creating the slots for epoxy where the rope rudder hinges will pass through. As I mentioned in a post along time ago cutting the slots which are then epoxy filled was slow and tedious using a router and not satisfactory using standard drill bits and jug saw. A year of home improvement and wood work on other projects have increased my knowledge base a bit and these slots were relatively quick and easy. The trick is using Forstner drill bits, 8" torpedo level, Ryobi battery drill with built in vertical level bubble, and sharp wood chisels.  First I level the area where the slot is going to be cut and solidly clamp everything in place on the work bench. Then using 1/2" Forstner bit I drill out the two ends of the slots keeping the drill as vertical as possible by watching the bubbel. Next I use the jigsaw to cut between the two holes outer edges. There is usually some material remaining since the jigsaw blade bends making the slot look like a dumbbell, but a few minutes with a just sharpened wood chisel and it looks like a proper slot.

Rudder leveled and first hole started.

Two nice square holes.

The jigsaw removes most of the material. 

Next a sharp chisel is used to square up the slot.
Now I'm certainly not saying this is the only or best way to do this slotting but it works for me. And by the time I finish the starboard rudder I should be expert at this technique:) The other hinge project includes adding kevlar to the the area where the rope hinges cross over between stern post and rudder. Maybe I'll get to that tomorrow but I've got work to do preparing and get my other boat Phoenix next week.

On the port stern post/skeg I taped off the area and wetted out the kevlar on a piece of plastic then placed it on the hinge area. To get the sharp bend I hold the excess kevlar in place with pop-sickle sticks and spring clamps.

Port stern post

The pop-sickle sticks are remove in a few hours before the epoxy kicks hard.


The trick is cutting the kevlar while the epoxy is still a bit sticky, but this stuff doesn't cut easy with a utility knife like fiberglass cloth. I end up using a Dremel with cutting wheel to cut 90%+ of the threads then brand new razor blade to cut the remainder. The rudders get the same procedure.

Saturday, September 24, 2011

Rudder Hinges - 80 Hours


In the boating world lexicon these rudder hinges are called pintle and gudgeons but Wharram has developed an ingenious rope hinge. The rope is drawn through matching five holes (in the stern post and rudder) in a figure 8 fashion.

Since end grain plywood is hard to seal I have decided to follow other Tiki builders and make an epoxy channel in to which I’ll drill the holes for the rope later. This task also called for new tools and skills.

The first picture is the fourth channel I made, each one looking better. These are the slowest and most tedious items up to this point of the build and there are 16 of them for the two rudders.

My first attempt was using a drill, jigsaw and chisels. Not a great method, the jigsaw blade is too bendy going through 30-mm straight and using chisels to clean out the slot and the edge recess was slow.

My final approach, at this point, is to use a router to cut the 3-mm indentation on the edge. Then drill one half inch hole and use the router to open up the channel. Then I come back with the chisels to clean up edges and such and then sanding to complete. The good news is much faster but the router is powerful and can take a chuck of wood away in a split second.

I decided to pour epoxy tonight before finishing up the details on the hinges. I’ll do another pour in the morning to finish off.

Scott Williams on his Tiki 26 did a really nice job of laying teak inserts on the edges as wear surfaces. I’m afraid my skills aren’t up to that task yet so I plan to apply a small piece of kevlar over the edge when I glass the whole area.

Wednesday, September 7, 2011

Missed it by (5mm) That Much - 34 Hours


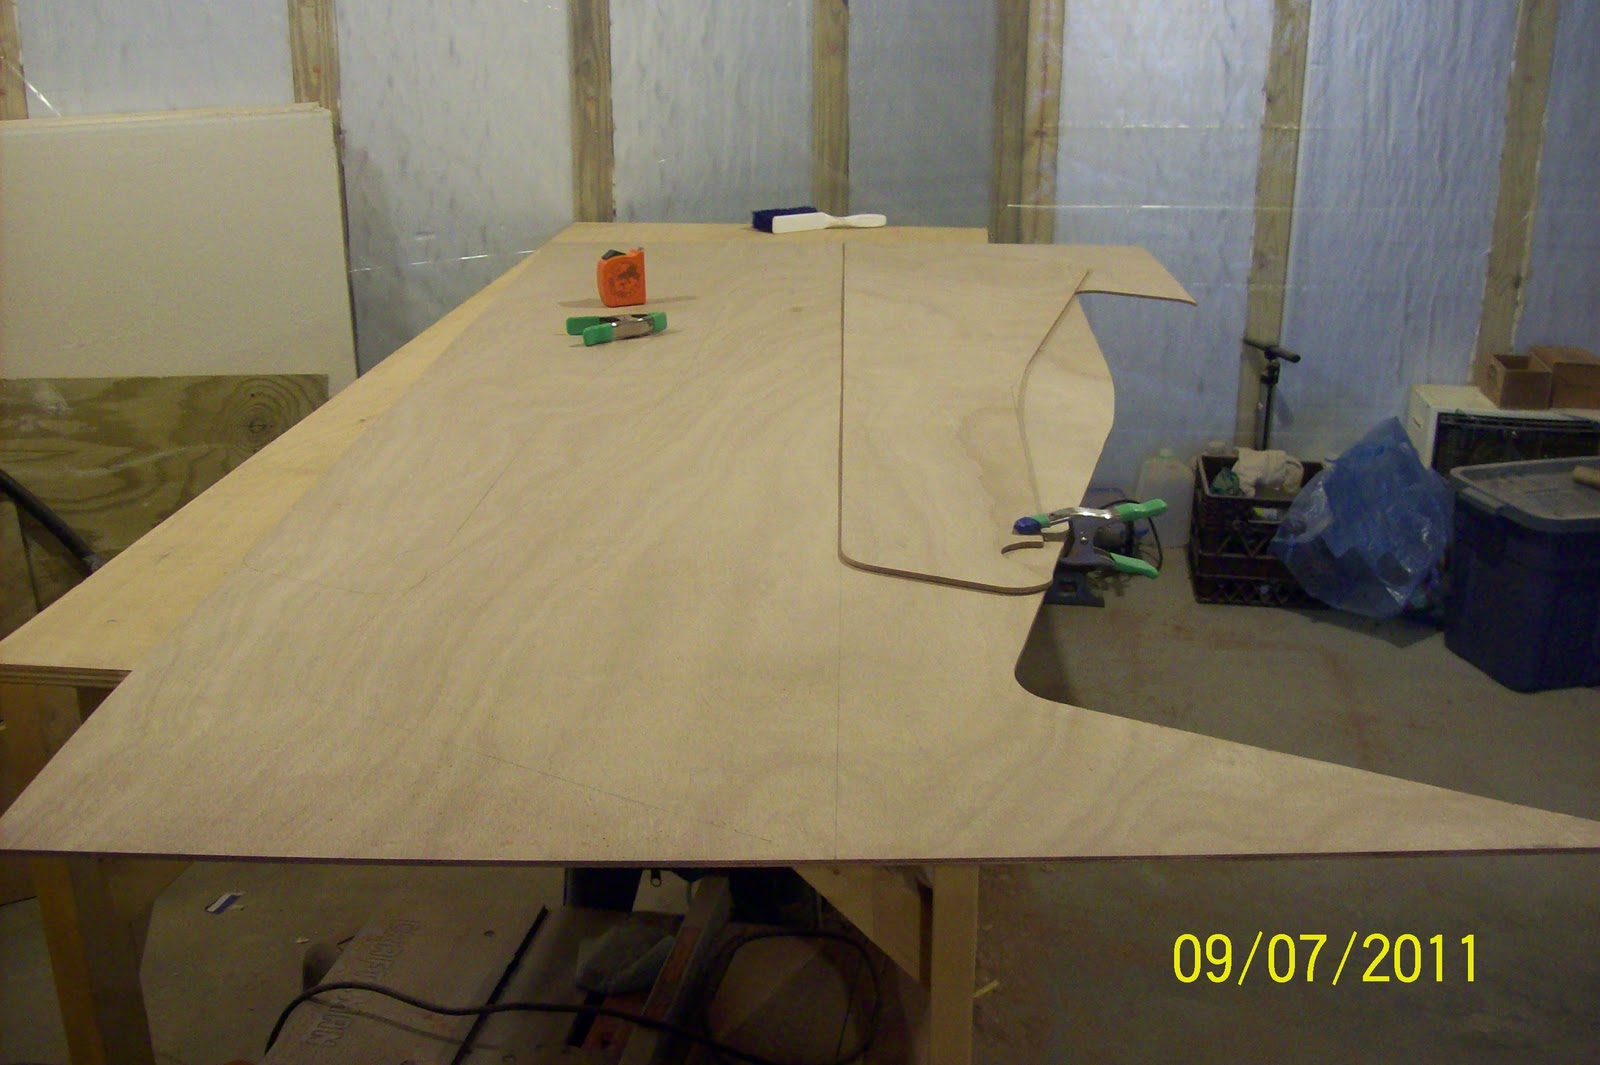
I have decide to jump ahead a bit and start the build of the rudders while various pieces of the keel and stem post soak up some epoxy. As part of the build plans there is one sheet that shows the layout of all parts built out of plywood. This layout is to minimize waste. This means that many parts are butted against each other on the layout of a sheet of plywood.

Four copies of the rudder are cut out of a sheet. Transferring the drawing of the rudder to the plywood was simple enough it’s just that in cutting out the first one I went a little wide at the two points where the copies meet. Luckily my cut was on the 6mm plywood that attaches onto two layers of 9mm(rudder is 30mm thick). The luck is the lower part of the rudder is planed down on the trailing edge effectively making the 6mm pieces a few mm narrower so that in the end the 5mm goof will vanish into wood shavings.

Lesson Learned: When parts are shown touching in the layout and take up an entire dimension of the plywood, triple check measurements and cut on the line where the points meet. If I can’t determine exact measurements, then as Wharram suggests, build a template first to test fit on the expensive plywood.