Hopefully you'll find something useful here if your ever building a Wharram Tiki catamaran.
Saturday, May 11, 2013
Feeling like a wingnut......
Alright, this is really a basic safe shop practice, leave the shop when tired. Tiredness is the proximate cause of spilling Acetone on the battery and charger for my Ryobi drill and saw. Chain of events, first clean a piece of work, but leave the can sitting on the floor and the cap not tightened, first bad move. Next move the charger to the epoxy table, why I did this I don't recall but obviously another bad move. Then grab the acetone can and attempt to place it next to the charger on the epoxy table, but instead allow it to slip from the hand and spill a cup of acetone on the plugged in charger. I'm not a chemist but I know acetone will melt plenty of plastics and wow did it eat up that charger. The black sections quickly became soft and the obvious staining on the battery. Not much to do to but unplug and allow the acetone to evaporate. The question is whether the circuity in the charge has been damaged? I'll open it up and give a visual when we get back and hope for the best.
Wednesday, May 8, 2013
Finally...Looks somewhat like a boat:) -- 250 hrs
![]() |
| BH1, not stitched, just spreading the lower hull sides. |
![]() |
| BH4 goes immediately forward of the butt strap in view. |
![]() |
| Removing 6mm from the floor bearer. |
Then there was the forward keel timber, an 18mmx45mm milled piece that also needed the aft end tapered, which I didn't realize until the hulls were stitched up and sitting in the cradles. So out came the sharp chisels. Good chisels are becoming my favorite tool.
Really don't what to sound negative, in fact I'm really happy seeing the hull setup, but if your building a Tiki 30 these are issues to watch out for. No more progress for a couple weeks as we head out to pickup another boat in Maryland. But before closing up shop I discovered another problem with starboard BH4 and this time the the problem is completely on my shoulders, the floor bearer is to high! The bearer is about 8mm high when the bunk bearers are flush with the lower hull side top:( A few quick measurements show that my build tolerances added up a few millimeters here and there. Oh well, something to ponder, best way to "fix" this error, on the long drive to Maryland.
Friday, May 3, 2013
Port Rudder -- 234hrs
Today some pictures, found the camera:) I picked the port rudder to work on today since I had been working on the port stern post. It needed the trailing edge shaped to improve water flow across, then I tackled creating the slots for epoxy where the rope rudder hinges will pass through. As I mentioned in a post along time ago cutting the slots which are then epoxy filled was slow and tedious using a router and not satisfactory using standard drill bits and jug saw. A year of home improvement and wood work on other projects have increased my knowledge base a bit and these slots were relatively quick and easy. The trick is using Forstner drill bits, 8" torpedo level, Ryobi battery drill with built in vertical level bubble, and sharp wood chisels. First I level the area where the slot is going to be cut and solidly clamp everything in place on the work bench. Then using 1/2" Forstner bit I drill out the two ends of the slots keeping the drill as vertical as possible by watching the bubbel. Next I use the jigsaw to cut between the two holes outer edges. There is usually some material remaining since the jigsaw blade bends making the slot look like a dumbbell, but a few minutes with a just sharpened wood chisel and it looks like a proper slot.
Now I'm certainly not saying this is the only or best way to do this slotting but it works for me. And by the time I finish the starboard rudder I should be expert at this technique:) The other hinge project includes adding kevlar to the the area where the rope hinges cross over between stern post and rudder. Maybe I'll get to that tomorrow but I've got work to do preparing and get my other boat Phoenix next week.
On the port stern post/skeg I taped off the area and wetted out the kevlar on a piece of plastic then placed it on the hinge area. To get the sharp bend I hold the excess kevlar in place with pop-sickle sticks and spring clamps.
The trick is cutting the kevlar while the epoxy is still a bit sticky, but this stuff doesn't cut easy with a utility knife like fiberglass cloth. I end up using a Dremel with cutting wheel to cut 90%+ of the threads then brand new razor blade to cut the remainder. The rudders get the same procedure.
![]() |
| Rudder leveled and first hole started. |
![]() |
| Two nice square holes. |
![]() |
| The jigsaw removes most of the material. |
![]() |
| Next a sharp chisel is used to square up the slot. |
On the port stern post/skeg I taped off the area and wetted out the kevlar on a piece of plastic then placed it on the hinge area. To get the sharp bend I hold the excess kevlar in place with pop-sickle sticks and spring clamps.
![]() |
| Port stern post |
![]() |
| The pop-sickle sticks are remove in a few hours before the epoxy kicks hard. |
Thursday, May 2, 2013
Finally back to work after almost 11 month --- 228hrs
Wow, it felt terrific to dust off parts and try and remember where I left off back in June 2012. I can't believe it has been so long, where does the time go....
My thanks go to Neil who is building Tiki 38 Gleda and Brad who is building Tiki 21 Beto. Their recent blog entries kicked me in the butt to get something done. And also a huge thanks to my wife who has been living in a substantially incomplete house for two and a half years. Heck I just got the utility sink out of the kitchen and built the cabinets and and installed a "real" kitchen sink just this week.
No pictures today since I spent the hours shaping, drilling,cutting,filling the port stern post/skeg, same work as I did on the starboard stern post all those months ago. It's close to complete now with just the drilling out of the two lower rudder hinge points and adding kevlar cloth to the wear areas. Then the port and starboard stern posts will be the same then it's time to finish off the rudders.
I've have so many other big projects but I'm determined to get at least one day a week dedicated to TIki #164.
My thanks go to Neil who is building Tiki 38 Gleda and Brad who is building Tiki 21 Beto. Their recent blog entries kicked me in the butt to get something done. And also a huge thanks to my wife who has been living in a substantially incomplete house for two and a half years. Heck I just got the utility sink out of the kitchen and built the cabinets and and installed a "real" kitchen sink just this week.
No pictures today since I spent the hours shaping, drilling,cutting,filling the port stern post/skeg, same work as I did on the starboard stern post all those months ago. It's close to complete now with just the drilling out of the two lower rudder hinge points and adding kevlar cloth to the wear areas. Then the port and starboard stern posts will be the same then it's time to finish off the rudders.
I've have so many other big projects but I'm determined to get at least one day a week dedicated to TIki #164.
Wednesday, April 24, 2013
The Spray set sail, 118 years ago
I the first time I read "Sailing Alone Around the World" about 20 years ago I thought I could appreciate the adventure but I realized later as I became a more experienced sailor I really didn't understand. It really was a different world, technologies that we today take for granted, GPS, and even some we consider obsolete, LORAN, were not even imagined in 1895. And my current dilemma of outboard engine choice would not have merited a moments though back then. Unfortunately we still have the water borne thieves we romantically call pirates.
I hope I can have Tiki #164 completed by the 119 anniversary of Spray leaving Boston harbor.
![]() |
| Capt. Slocum sailed out of Boston Harbor aboard Spray April 24, 1895 |
Monday, December 17, 2012
I have a confession to make........
Ok here goes.... I love full keel heavy displacement sailboats. I know that doesn't sound too strange to a stranger but to anyone how knows my history... well it's a discontinuity. My sailing experience and ownership goes something like this..Hobie Cat 16, much bigger racing Cat, racing on a couple 30 something fin keel boats, 10m cruising Cat, self built sailing pram, 26ft cruising Cat, and now building a Wharram Tiki 30 catamaran.
But the truth is I've always looked at Westsail 32s and smiled a happy smile. I don't know what happened decades ago to caused the neural paths in my brain to say that boat just looks "Right". And not just Westsail 32s, but just about any double ender. Then there is another style that trigger the "Right" sailboat neurons and that is epitomized by the Pearson Triton/Alberg 30/Pearson Vanguard 32.
The result is that I'm constantly on the prowl looking at these old boats, and I do mean old from 1959 to the mid 1970s. So naturally while we're in the Annapolis MD area for several weeks I can't help but look for deals in this target rich environment.
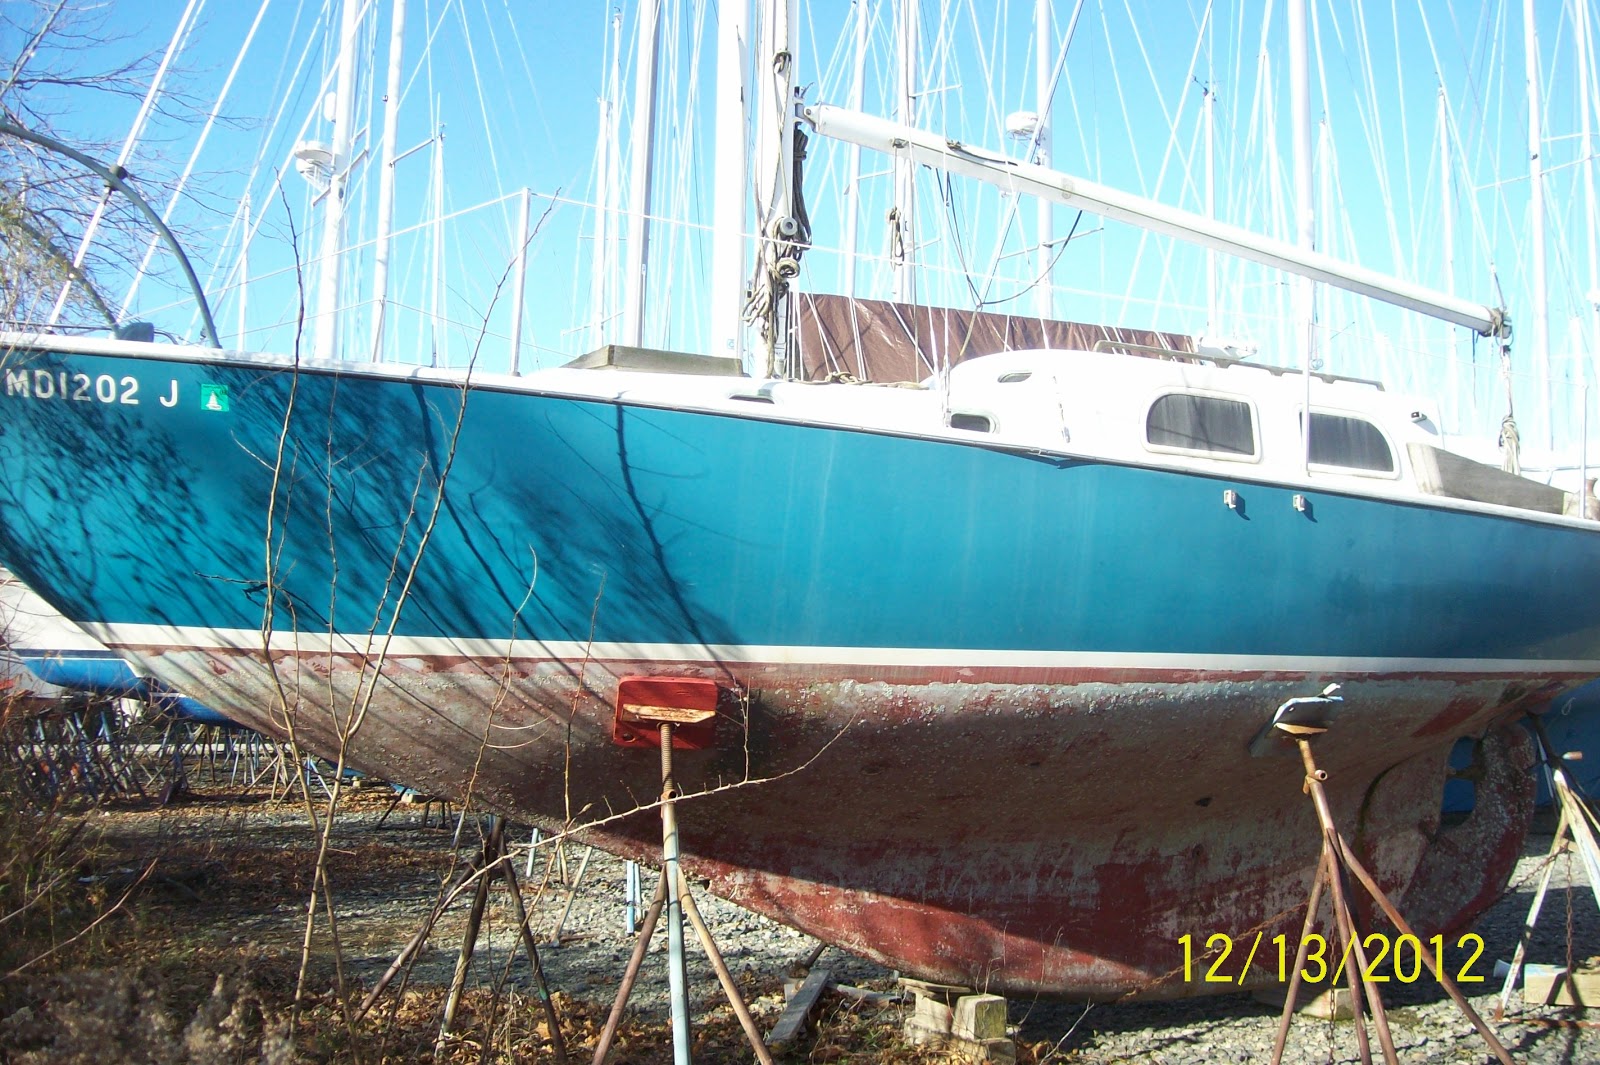
Well I happened across Phoenix a 1960 Pearson Triton #190 in Rock Hall, over on the eastern shore of Maryland. She's rough but had a new spar and rigging installed in the early 1980s. But there was a small problem, there was a large yard bill at the marina, about $2500. The boat was not worth that much to me so after negotiating with the yard manager and PO, I ended up paying $500 out of pocket for Phoenix. This includes storage until May 2013, unstepping the mast and loading her on to my trailer. Not a bad deal for me and the yard gets a non productive boat out of a packed yard. Now I just need to buy a trailer the can handle about 8000lbs.
My intention is to set up Phoenix minimally as a daysailer and occasional weekender and maybe some Wednesday night PHRF racing. I'll be putting her on a mooring in Belfast harbor but before that she needs some work. I'll document the raise of S/V Phoenix in another Triton blog. Just a side note, the 1965 movie "The Flight of the Phoenix" is great.
But the truth is I've always looked at Westsail 32s and smiled a happy smile. I don't know what happened decades ago to caused the neural paths in my brain to say that boat just looks "Right". And not just Westsail 32s, but just about any double ender. Then there is another style that trigger the "Right" sailboat neurons and that is epitomized by the Pearson Triton/Alberg 30/Pearson Vanguard 32.
The result is that I'm constantly on the prowl looking at these old boats, and I do mean old from 1959 to the mid 1970s. So naturally while we're in the Annapolis MD area for several weeks I can't help but look for deals in this target rich environment.
Well I happened across Phoenix a 1960 Pearson Triton #190 in Rock Hall, over on the eastern shore of Maryland. She's rough but had a new spar and rigging installed in the early 1980s. But there was a small problem, there was a large yard bill at the marina, about $2500. The boat was not worth that much to me so after negotiating with the yard manager and PO, I ended up paying $500 out of pocket for Phoenix. This includes storage until May 2013, unstepping the mast and loading her on to my trailer. Not a bad deal for me and the yard gets a non productive boat out of a packed yard. Now I just need to buy a trailer the can handle about 8000lbs.
My intention is to set up Phoenix minimally as a daysailer and occasional weekender and maybe some Wednesday night PHRF racing. I'll be putting her on a mooring in Belfast harbor but before that she needs some work. I'll document the raise of S/V Phoenix in another Triton blog. Just a side note, the 1965 movie "The Flight of the Phoenix" is great.
| Actually the Teal color looks pretty good in person. A yard man said Phoenix has been sitting here unloved for at least 12 years. |
| An ex-husband heisted the motor years ago, another interesting story:) |
| The starboard port is missing the securing nut/bolt. A piece of Duck tape and wire is keeping it closed. |
| I like that name, I think I'll keep her. |
| I pumped her out and a few tarps to keep the worst of the winter out. |
Friday, July 6, 2012
Checking In and another Tiki build(how not to)
Checking In. It’s been a few weeks since Tiki #164 has gotten any love. I have a great excuse however, we live in a 34 diameter concrete geodesic dome that we bought about two years ago. The house is a project all itself. When we bought it only stud framing and subfloors were mostly done. No plumbing beyond a well feed to a water tank. No electrical beyond the breaker panel. And just a few pieces of drywall leaning against the studs. Oh and the reason we got it cheap, it leaked. So tas much as I’d like, the Tiki can’t get our undivided attention. The past few weeks have been tiling the house bathroom, building knotty pine walls, and building kitchen cabinets. We’re heading off to a wedding and visiting family soon so I’m hoping to be back to work on Tiki #164 by mid August.
But a man can not survive on kitchen cabinet builds alone, well I can’t at least:) I need at least a weekly boat fix, so when a pair of Tiki 26 hulls showed up on craigslist I called the guy and told him I’m just curious to seem them since I’m building a Tiki 30. It wasn’t too far away and it was a great lesson…. on what not to do.
This is the major problem buying a Tiki secondhand, each is handmade by people ranged in talent from a master shipwright who’s joinery work would be a match for the finest yachts built to someone who really shouldn’t be trusted with power tools and who’s work is not so much seaworthy as dumpster worthy. These hulls were built by the latter type person. Strangely, it inspires me to see this junk, while I might not hit master shipwright standards I’m a hell of a long way from this trash. The pictures are of just a few build issues. These hulls also suffered from weather exposure. A sample of the problems was fiberglass that was delaminating along the hull to deck join due to the exterior stringer at the top of the hull topsides being rotted.
![]() |
| The gap above the bulkhead is easy to see, but the wedge on the center stringer isn't so obvios:) I also wonder how much sea time it would take before the knot above the left stringer pops out? |
Subscribe to:
Posts (Atom)