Today progressed from strictly bulkhead work to the sternpost/skeg.(aft most part of the hull where the rudder will attach). Last fall I slotted and epoxy filled the areas where the rudders will be lashed on and added kevlar tape to some of the wear areas. Today I decided to drill out the holes for the rudder lashing. I thought for sometime about using a small drill press I have but thinking about the rigamarole of setup I decided to just use my cordless drill and forstner bits. By laying the sternpost horizontal and using the bubble level in the rear of the drill it was pretty easy to get decently straight holes. The STOP in the title refers the adjacent picture. I need to return to kindergarten and relearn my counting. First person to identify my problem wins a Guinness stout. You’ll need to stop by the house to collect, but be warned I may put you to work:)
 |
| Problem?? |
 |
| Just watch the bubble. |
On the bulkhead front, I decided to add 6oz fiberglass to the lower sections that will become the buoyancy compartments. My thought is these areas can get condensation which will settle to the bottom and likely be unnoticed for weeks if not months. My experience with just coating plywood with 2 or 3 layers of just epoxy is it can fail when constantly submerged. But when cloth is added, no problems. So at the weight penalty of literally about 18oz for both hulls, I’d rather be sure the lower bulkheads don’t eventually rot.
 |
| BH1 lower forward buoyancy compartment side getting 6oz fiberglass |
Todays favorite tools are the Ryobi Cordless 18V Drill and Forstner bits. I get hours and hours of use out of one charge and I have enough things that need a plug, But what puts this over the top are the Forstner bits. They aren't cheap but they bore flat bottomed holes and have near zero tear out at the edge of the holes.
 |
| Hero tools of the day:) Also the traveller rigging holes are drilled out. |


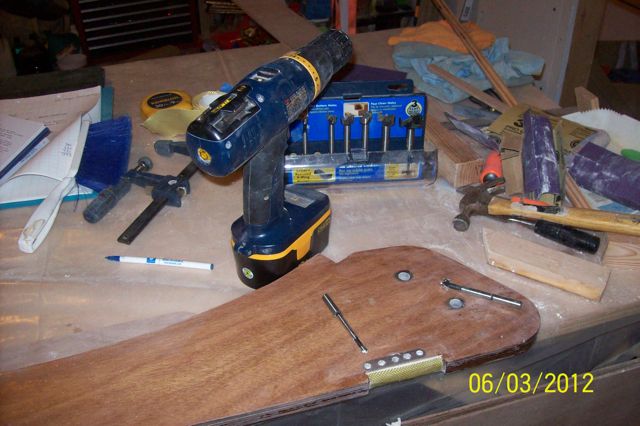
six holes instead of five?
ReplyDeleteBINGO! You win the stout Shawn!
ReplyDeleteMy tired eyes kept seeing that big number 6 which represents the hole diameter and my mind translated it into six holes to be drilled:( I don't really think it matters much but I did refill the holes and re-drill.