Sunday, October 23, 2011

Misread the Drawing,Duh! -- 127 Hours

In my last post I said the drawing of BH3 had an error, not so, I had the error. I mistook the line drawing of the floor bearer for the plywood joint. The 287mm is to the top of the bearer and the elevation of the ply joint is not given. If I’d realized this I would have been forced to look at other drawings to get the needed info where I would have found the proper sequence, to draw from the top down.  But no harm no foul, BH3 is fine, just needs that floor bearer.

It’s turned out for me that just using weights to clamp the various bearers works better than the small bar clamps. The bar clamps hang off one side imparting a torque causing the wood piece to move. This can be stopped by either using small nails or clamping down harder but then too much thickened epoxy squeezes out.  So I raided the panty and the cans of chicken, tuna, turkey,and clams do a decent job. Also since I leave the bearers long initially I can use the overhanging part to position the bearer.

Build Schedule Note:
I had been thinking I’d get this Tiki done in a 1-2 years, but other commitments makes it look like 3 or maybe 4. As it was we are planning to leave Maine and head for warmer climates early December, but now my other interest is going to be taking up much more time. 
I love bicycling(Trident Stowaway 2 trike really) and have decided to celebrate my 50th birthday by riding my trike from Belfast Maine to Anacortes Washington generally following the ACA Northern Tier Route. I’ setting aside May-Aug 2012 for the trip and in the lead up I’ll need to do much training so naturally boat building time will suffer.

Saturday, October 15, 2011

3rd, 4th try is a charm -- 112 Hours

I’ve spent the last several hours drawing and cutting out bulkheads (BH) and wasted a few hours with vague directions and errors in the drawings.

I began by drawing BH2 then working across the 6mm plywood drew BH1 and then BH3 and this is where problems began.

1st issue. The parts layout sheet shows the center line of BH3 to be 1300mm from the opposite end of the plywood sheet from BH1. When I did this, it became apparent that there was not enough room between BH3 and BH1. Finally on the third try I found that 1100mm was a better number giving space for every BH. 

2nd issue also had to do with BH3, this time it was the dimension of the lower part that is cut out separately then joined to the top piece to create the whole BH3. The drawing show the lower piece to be 287mm tall but there’s the error. I built using a baseline method from the keel as shown in the drawing and ended up missing 6mm at the top of my plywood sheet.

After scratching my head awhile I read the example on the layout sheet of how to draw BH3, should have done this first but it looked pretty straight forward. To my surprise the example starts at the top and works down. There is still the error but it’s an easy fix when you get to the bottom. As shown in the picture that lower part is  287mm but it should be 293mm then the top part fits in the standard 48 inch with of the plywood specified. 
Starting at the keel, BH3 is 1217+295 tall or 1512mm. The top piece is therefor 1512 - 287 which is where the ply joint is shown, that is 1225m. The problem is that a standard piece of plywood is 48 inchs wide which equals 1219mm. There is the missing 6mm. So the bottom section needs to take up the slack.

Saturday, October 8, 2011

Lower Hull Sides almost ready -- 106 Hours

All 30 clamps I bought from Harbor Freight and a few extra C-clamps were used attaching the stringer along the upper edge of the lower hull sides. Getting that 27ft length aligned with the hull edge was a little tricky. I finally settled on using small nails to first tack the stringer in place then used the clamps to apply even pressure along the length. After two days of cure the nails are easily removed leaving on small holes to later fill.

Scott Williams on his Tiki 26 uses drywall screws for this type thing but I found they tend to push the two pieces apart before joining. The screws need to be screwed down to pull the pieces together but that seems like too much pressure. The small nails work good for me, your mileage may vary.

My next task is up in the air. The build plans show stitching the hull sides to the backbone, stem and stern post then on the next page show installing the bulkheads. I think I’ll build the bulkheads first so I don’t have the stitched hull taking up space.

Monday, October 3, 2011

First Scarfs - 98 Hours

Inside that mass of clamps are the joined scarfs of two 16 ft and two 12 ft long 20mmx45mm stringers for the lower hull sides. I guess it might be a little overkill, but no worries if it works and the great news is that these stringers are the last pieces needed to get me off page one of the build manual!!!

This was also the first use of the newest tool to enter my collection,
a Ryobi AP1301 Planner, cheapest one I could find at Home Depot:). I rough cut using the table saw then send the stringers through the planer to get the exact dimensions. Then I used the Ryobi Hand Planer I picked up a few weeks ago to make the scarfs.

Tuesday, September 27, 2011

10% Done, maybe - 92 Hours

The Wharram estimated time to build a Tiki 30 is 900 hours, as of today we passed 90 hours. But how can you tell if your really 10% done? Here is where we stand at this point:
Keel backbones are done.
Stem posts done.
Stern posts done but for final drilling for rudder hinges.
Lower hull sides for one hull cut out and partially epoxy coated and the aft two sections are butt joined.
Rudders are laminated and marked for drilling.
Couple bulkheads drawn ready to be cut out.

Just doesn’t feel like much of a milestone. I think a truer milestone will be first hull in it’s stands with bulkheads installed and in theory at least able to float like a boat and not just a pile of wood.

Saturday, September 24, 2011

Rudder Hinges - 80 Hours


In the boating world lexicon these rudder hinges are called pintle and gudgeons but Wharram has developed an ingenious rope hinge. The rope is drawn through matching five holes (in the stern post and rudder) in a figure 8 fashion.

Since end grain plywood is hard to seal I have decided to follow other Tiki builders and make an epoxy channel in to which I’ll drill the holes for the rope later. This task also called for new tools and skills.

The first picture is the fourth channel I made, each one looking better. These are the slowest and most tedious items up to this point of the build and there are 16 of them for the two rudders.

My first attempt was using a drill, jigsaw and chisels. Not a great method, the jigsaw blade is too bendy going through 30-mm straight and using chisels to clean out the slot and the edge recess was slow.

My final approach, at this point, is to use a router to cut the 3-mm indentation on the edge. Then drill one half inch hole and use the router to open up the channel. Then I come back with the chisels to clean up edges and such and then sanding to complete. The good news is much faster but the router is powerful and can take a chuck of wood away in a split second.

I decided to pour epoxy tonight before finishing up the details on the hinges. I’ll do another pour in the morning to finish off.

Scott Williams on his Tiki 26 did a really nice job of laying teak inserts on the edges as wear surfaces. I’m afraid my skills aren’t up to that task yet so I plan to apply a small piece of kevlar over the edge when I glass the whole area.

Sunday, September 11, 2011

Be Prepared - 42 Hours

Not much exciting happening the past few days, just draw, cut, glue and repeat. But one important lesson did pop up sometime this week. Always double check the orientation of parts that are laid out to be assembled.
The way we work is to lay out the parts to be laminated together, in this case a keel side and the backbone assembly. Then using Raka 127 epoxy resin with the 606 slow hardener we coat the raw wood of the surfaces to be joined. These surfaces are allowed to set for several minutes while we’re typically doing some other last minute task. Then a thickened epoxy mixture is made up and applied to one surface, the keel piece in this case, and that is then flipped over and clamped to it’s mate, in this case to the backbone.
The problem was that somewhere between the initial decision to glue these two parts together and laying them out and the actual applying of epoxy the keel side got flipped! So I applied epoxy and thickened epoxy what is the outside of the keel not the side to be glued to the backbone. This wasn’t noticed until we were ready to pick it up and flip it in to place, Doh!! 
Luckily we had used the 606 slow hardener with the thickened epoxy and it was an easy matter to scrape it off the keel and apply it to the backbone. Then we just flipped the keel over on the workbench, the workbench is covered with plastic that the epoxy will not stick to, and proceeded to apply plain epoxy to the keel. So in the end we just ended up with one keel side with an early coat of epoxy.
Had we been using the 610 fast hardener things may have been different. When mixing just a quarter cup of that it will start to kick, get hot, in the cup in under 10 minutes with a room temperature of about 65 deg F.

Oh, and the picture has nothing to do with the described event, it just shows the interesting scrap pieces of wood that are generated when 8 copies of the rudder are cut out.

Wednesday, September 7, 2011

Missed it by (5mm) That Much - 34 Hours


I have decide to jump ahead a bit and start the build of the rudders while various pieces of the keel and stem post soak up some epoxy. As part of the build plans there is one sheet that shows the layout of all parts built out of plywood. This layout is to minimize waste. This means that many parts are butted against each other on the layout of a sheet of plywood.

Four copies of the rudder are cut out of a sheet. Transferring the drawing of the rudder to the plywood was simple enough it’s just that in cutting out the first one I went a little wide at the two points where the copies meet. Luckily my cut was on the 6mm plywood that attaches onto two layers of 9mm(rudder is 30mm thick). The luck is the lower part of the rudder is planed down on the trailing edge effectively making the 6mm pieces a few mm narrower so that in the end the 5mm goof will vanish into wood shavings.

Lesson Learned: When parts are shown touching in the layout and take up an entire dimension of the plywood, triple check measurements and cut on the line where the points meet. If I can’t determine exact measurements, then as Wharram suggests, build a template first to test fit on the expensive plywood.

Sunday, September 4, 2011

18 mm Plywood - 28 Hours

If speed is more important than cash then I would suggest buying one sheet of 18-mm plywood instead of two sheets of 9-mm to build the Stem and Stern Posts. With the 9-mm two copies of the stem and stern posts must be laminated together to get the 18-mm thickness shown in the plans. In the pic the two stem posts are complete and one stern post is cut and ready for gluing.

My guess would be that at least an extra two hours were needed to build up these parts as opposed to just cutting out of a single piece of 18-mm. I had priced the 18-mm but I don’t remember the cost difference between 1 sheet of 18 vs 2 sheets of 9, but it must have been enough to trigger my frugality alert.

Friday, September 2, 2011

Clamps - 21 Hours

You can never have too many clamps when boat building! Here are 30 brand new Harbor Freight bar clamps put in to action! The 20 6-inch bar clamps are on the keel and the other 10 12-inch clamps are on the Stem Post (forward most part where the hull sides come together) on the far side of the table. I have to crawl under the table to use that side, but using a moving dolly it’s not too bad to scoot under. It also really helps that Donna is on the front side mixing epoxy for me so I don’t have to scoot back and forth.

Wednesday, August 31, 2011

Don’t Work Tired:( - 16 Hours

Today's lesson, Don’t work tired! Today wasn’t a long work day on the Tiki but it was a low energy day. I cut the slot for BH3 (Bulkhead 3) 10mm wide instead of the specified 7mm. The constant shift between inches and mm didn’t help either.

I don’t think this is any kind of tragedy just a little more epoxy filling.  The beauty of this type of construction is that not every cut needs to be perfect since epoxy fillets cover many small mistakes without compromising strength.
The good news is that all the plywood for both backbones, the area between BH2 and BH6, are completed and ready for epoxy.

Tuesday, August 30, 2011

Keel Backbone - 9 Hours

The first two sheets of 9mm plywood are cutup into boat parts. In particular the backbone, backbone doubler, and keel sides as named on the plans. Transferring a scaled picture(1:10) of a part to plywood at full scale, I believe this is called lofting, is a little tricky the first time through. For every piece I would expect a station, a point along the x axis, and an elevation, a point along the y axis, to describe a part. With the keel curved profile there doesn’t seem to be enough information to draw the curve or more likely I can’t glean it from the plans.  Now the curve on the bottom of the keel may not seem critical but the parts layout on sheet 2 of the plywood leaves very little room for error. Sheet has four keel sides and two forward backbone doubles crammed on it.

Lessons for the Day:
1.  I think that with all the fiddling with these curved "best fit" parts, it probably would have been better to cut out a template on some scrap 1/8” plywood to make sure of fit before advancing to the expensive plywood.

2.  I can cut a much more accurate line using my 5-1/2” Roybi circular saw than my Roybi Jig Saw. I think I’m doing fine on a long cut with the jig only to look back and see the drunken sailors walk. Then out comes my Roybi 3”x18” Belt Sander to throw that sailor in the brig.

Buying and using the Roybi 5-1/2” circular saw was a great tip from Scott Williams Element II Tiki 26 blog. Thanks Scott!

Sunday, August 28, 2011

Units of Measure

I pulled out my first sheet of 9mm plywood, stared at the plans and with calculator and imperial(inches,feet,yards,etc) measuring devices proceeded to transfer the metric draw parts to the plywood. Constantly shifting between imperial and metric is a pain. I wish President Reagan had let the US go metric back in the day and by now all my tools would be metric.
As it is I spent three hours cutting out one aft keel backbone.

I ordered a 10m measuring tape from Amazon and then found one of my old triangular drafting scales that has 300mm range. The only downside for me working in metric is that I don’t have an intuitive feel for say 152 mm,  but 6 inches on the other hand and I can tell by eyeball if that line or part is about right.

That first cut was tough as there is no going back now, the clock has started!

Friday, August 26, 2011

Plywood is here!!

Finally after much rigamarole I have all my 6mm and 9mm plywood. The wood showed up in the back of a PAS 18 wheeler and the driver and I transferred it to my F250 pickup truck in the town office parking lot.  Unbelievably four companies were involved getting this plywood from White Plains New York to Knox Maine. Condon Lumber, FreightQuote(shipping broker), NewPen(shipper that picked up the wood), and Portland Air Shipping(PAS) the company that delivered the wood.
The main issue was that a semi truck and trailer cannot get up our driveway and we can’t unload on the main street. This fact was on the shipping order but NewPen dropped the ball.
If the load had been delivered to a business I think things would have been smoother. Or as it was find a public place and meet the semi truck to transfer to my truck. I did get permission from the town office first.
Also I learned that these freight companies have buried in their contracts that they have up to 6 months to make delivery! Which means if they mess up and send the load to Aruba, oh well, yell and scream if you like but 6 months is 6 months.

If I had to do this again, if at all possible, I would just drive and pick up the plywood, it would cost no more overall and there would be certainty.

Tuesday, August 2, 2011

NO PLYWOOD@#

I wish I could say Condon Lumber has worked out great in supplying my plywood, but that's not the case. Last Wednesday I was told that the 6mm plywood had just arrived at their dock and would be shipped either Thursday or Friday. As of today it still has not shipped. So another week down the tubes.

We're headed to the mid-west for some family functions, so now the week of the 21st is the soonest real start of construction.

Monday, August 1, 2011

Build Start?

This could be my first build day or not. I decided to try and rip some 20x32(mm) and 20x45(mm) stringer material out a piece of 2x4 (inch)Douglas Fir I picked up last week. My cheap table saw worked OK but it slowed going through that fir compared to spruce or pine.

I did buy vertical grain fir but when cutting out the stringer pieces the grain is as shown. Can anyone tell me if this wood is stronger in one grain orientation vs the other? The middle piece, 3rd from left is destine to be the lower hull outside stringer which will be scarfed to the 5th from left once I trim it down a bit.

Sunday, July 31, 2011

Experimenting

I've pretty much gotten my working area ready to go with the build. There are a few items still to iron out, like where my epoxy station will be. I did try a few practice items. First, I made an 8:1 scarf using some scrap pieces of wood. I got it made using saws and belt sander but I think I'm going to invest in a hand held power plane. I think there are going to be enough scarfs to make that tool earn a location on my bench. Next, I made some notches like will be needed to the deck stringers. Couple cuts on the table saw and a little chisel work and they looked good, but my old chisels are pretty tired so I'm going to get a couple new ones and treat these right. I was pretty happy since I've never did either of these things before. Starting to feel like I know an tiny bit about wood working.

Friday, July 29, 2011

Workspace

The work shop area preparation took a little more work than I initially expected. The wall that needed opening up was not just a partition, it was load bearing. Now this was unexpected since the AI Domes  plans for our house don't show this wall being load bearing. A trip to the local lumber store for some 2”x10”x10ft lumber for a header, installed temporary bracing, install the header and I was ready to move on to building work benches. 

I really debated about work benches. In general the more the better given space, but specifically in this case is a bench long enough to work on full length parts like the hull sides, keel, mast and longer stuff like cross beams. Due to the shape of the dome basement I have an area that is 32ft long but only 12ft wide at the garage door side and 7ft on the opposite wall. So a 30ft bench 32”-36” deep will preclude building two hulls at the same time. My psychology is such that I'm loath to build one hull to the stage of moving it outside before beginning the 2nd hull.  So I've decided to build three 3ftx8ft benches that can be lined up and leveled for long work and when that is done moved back from the scared hull area.    Also I built a short bench for the table saw that will place it's table at the height of the benches, 36inch.

Spoke with Condon Lumber and my plywood should be here next week!
Also I just found out a sheet of Okoume 6mm weights about 18lbs while a sheet of Meranti 6mm weights about 24lbs, so for the full load of plywood the Okoume is closer to 350lbs lighter than the Meranti. Not only is the Okomue lighter it's a joy to work with, I've never seen nicer plywood, never any voids and beautiful when finished, very glad I went with Okoume.

Tuesday, July 19, 2011

Plywood


Today was the first buy of materials that will eventually become Tiki 30 #164. A few thousand dollars from my hands to Condon Lumber of White Plains NY hands and I own a stack of 29 6mm & 18 9mm 4'x8' B.S. 1088 Okoume plywood, to be delivered within two weeks. This generic Okoume is about half the cost of the Joubert I used building the CLC dinghy. I think this is a good choice as it saves over $1000 and the wood is to the same BS 1088 standard which includes no interior voids, passed the twice boil test, clear faces and the 9mm has 7 plys and the 6mm has 5 plys same as the Joubert. The other reasonable,IMO, choice would have been Meranti plywood. The Meranti also meets BS1088 standard and is cheaper but its denser so the total stacks of plywood weighs about 280lbs more. That represents nearly 10% of the unladen wait of #164 and I'd rather use that weight for an extra 30gallons or so of water.

Sunday, July 17, 2011

Time for Action


Today it's time for action on the Tiki 30 #164 build. I haven't decided yet if I'll try to time this build it goes against my natural grain but it would be a nice data point. All of today's work was just applies to my particular situation. Removed drywall, move three receptacles, moved two overhead light switches, removed door and frame. Need to wait on pulling the stud wall until I get to town for some 2”x8” lumber for a header across the new opening.

At one point while measuring how the hulls would fit in the allocated space it dawned on me my garage door is only 80” tall. After looking at the plans for about a half hour I could not nail down the max height of the hulls. I know the max is at the aft end of the cabins but I couldn't get an exact number. So I call a nice guy, Marc, in central Florida who had shown Donna and I his Tiki 30 build this past winter. He was just getting to the shop to work on the boat and measured his boat. Came out to 79.5” with his boat elevated about 1.5” in it's rolling cradles. Whew, that make like easier. Still don't know how I'll flip the hulls to glass the sides and bottoms.

And finally Donna put the plans on large pieces of cardboard in the hope to keep them from getting destroyed during the build.

Saturday, July 16, 2011

Site Selection:


I blew right past the May 1st start, but then we didn't even arrive in Maine until May 9th. Then there was and still is a long list of must get done items on our Dome house. But things have gotten a little less hectic and thoughts of the Tiki 30 come back. This picture gives and idea of the to be the site for the build of Tiki 30#164. Our dome house has a ruff diameter of 34 ft but the sides with entryways cut down that measurement. So the dimension from the face of the garage door to the opposite wall, which is through behind that stud wall through the door, is 31 ft 10 inches. From garage door to stud wall is only about 21ft, so some house remodeling will be the first order of business. The plan is to open up that wall about 7ft to the right of the door. The glass door will be reused in the main floor mud room.
 Next comes finding a place to keep my CLC Passagemaker dinghy.

Monday, April 18, 2011

Simplify, Simplify, Simplify

"Simplicity, simplicity, simplicity! I say, let your affairs be as two or three, and not a hundred or a thousand … Simplify, simplify." --H. D. Thoreau

The wait continues, Donna’s new 2nd Generation Catrike Trail has still not arrived at Mt Airy Bike. So we haven’t departed for Florida which means we haven’t left Florida to get to our home  in Maine the Tiki construction site. So I have been bent over the Tiki 30 plans for hours and hours over the last few weeks.

Every boat is a compromise naturally enough but I’ve found myself wanting more in the area of sailing performance out of my boats. But sailing performance is in near direct opposition to crew comfort. I forget where I read this and I’m in debt to the original author, “anything on a boat that doesn’t make it sail better, then by definition, makes it sail worse”.

Our first boat Tschuss, which was a Catalac 10M catamaran, sailed with two drogues in the water. Sure the three blade Michigan props made Tschuss a good motorboat but seriously detracted from any sailing performance. Our next boat Rubicon was a Heavenly Twins 26ft catamaran. Rubicon with an outboard that raised to the bridge deck and canoe hulls could sail circles around Tschuss. We lived aboard both and Tschuss was without a doubt more comfortable but I liked Rubicon immensely more.

I saw my first Tiki, I think it was a Tiki I didn’t know of Mr Wharrams designs in the summer of 2005, and I was in love. Here I was on this hideously complex boat, Tschuss, and there was that simple Tiki and it’s owners enjoying the same harbor. Now I’m reading about Rory’s “Cooking Fat” a Tiki 21 with just netting for a bridge deck and no motor and his amazing round the world adventure and cross Atlantic Jester Challenge races.  I really think that the best approach will be to keep changes to the basic Wharram design to the minimum, i.e. keep it simple!!

Yeah! got the call the Trike is in!!!! So no more Tiki updates for a few weeks when hopefully the build will be started:)

Saturday, April 16, 2011

Can I really have refrigeration?

It’s been a rainy day so no trike riding. It’s been a day of design work. “Design work” a kind way to describe trying to put 10 lbs of sand in a 8 lb bag.  The TIki 30 was really designed as a tropical backpacking type boat. This makes sense since it can be disassembled and transported across a continent behind a small pickup truck. My problem is trying to put some more modern amenities in the equation. Adding a two burner stove or even an oven is trivial compared to adding refrigeration which is anything but trivial.

In this case I would like to have a small, approximately 5 cu-ft, ice box with Adler/Barbour Cold Machine refrigeration. I know that many long term cruisers do without refrigeration, heck some even do without a motor. But we’ve had refrigeration on our last two catamarans that we lived aboard from 2005 until last November. So I’m spoiled.

It is not an easy or cheap to add refrigeration. Here a a few things that need to be considered.
  1. Spend over a grand to buy the Adler/Barbour compressor(CU-100) and evaporator(VD-150).
  2. Find a well vented place to mount the compressor, preferably out of ear short. The evaporator will be in the Ice Box.
  3. Design a 12 VDC battery system that has enough capacity to go a few days without recharge. We got away with 4 deep cycle batteries in the past. This will be adding to the boat probably 500 lbs in batteries, switches, circuit breakers, wire, etc. That’s 22% of the boats designed load carrying ability. Batteries and hardware will run several hundred bucks. And then find a place to put a few cu-ft of batteries.
  4. Now design a way to keep these batteries charged when not at the dock. I’ve found that with a sunny day and under 90 degF ambient, my last ice box could keep cold with two 80 watt solar panels. But it’s not always sunny so the batteries are needed to carry through the less than sunny times. A wind mill would also help, since it does seem that when those cold fronts come through wind also comes with the clouds. The weight of a couple panels and a wind mill, cables, switches etc. can run about 50-lbs total.  And cost is again well over a grand.  And find a few sq-ft of space to mount the solar panels, without shadows. I don’t even consider running the engine or a generator since they destroy peace and quiet and have even higher life-cycle costs.
  5. Next it would be nice when we’re at a dock if the batteries could be kept topped off using shore power, that will extend their lifespan and we could even run a toaster. So now I need to design an AC system with weather proof power cord, receptacle, circuit breaker, battery charger, wire, connectors, etc. Probably another 50-lbs of stuff and more than a couple Benjamin’s out of my wallet. 

So it probably costs 3 or 4 grand and adds about 600 lbs to a small boat. Damn, Donna and I could buy a couple of good beers every night for a couple years for that price and the only added boat weight would come from the extra pounds the beer will put on our bodies.

Wow, after typing all that up I’ve convinced myself that we need to learn to do without refrigeration, it’s just too expensive in cost, weight, and volume. A supper well insulated Ice Box will have to do. Plus this boat is not going to be a full time live aboard vessel, the plan is to cruise for 3-4 months a year.

Thursday, April 14, 2011

Tiki is back on!

The rational half of my mind say "there is no time, a house to build, training for 2012 RAGBRAI" but then I see a picture of a Tiki and my mind immediately begins imagining white sand beaches and clear blue warm waters, and my irrational mind says "so what I WANT A TIKI 30!".
So I've been going over the plans again trying to see if I can fit the items we put in the "very nice to have" category.
  1. A propane stove with oven,  a Force 10 compact would be nice.
  2. Refrigeration.
  3. Air Head composting toilet. 
  4. In hull galley table. 
Now these hulls are narrow, I think pretty near a 10:1 length to beam. So after several drawings and discussions with Donna, the oven is out. Some type of smaller stove that can be moved from a in hull location to on deck location is in. Then I think I have room for the other "necessities".

Tuesday, March 29, 2011

Time to stop before getting started

Due to to many items on the agenda the Tiki build will be on hold until at least summer 2012. Thought I'd say this since I hate it when I find a blog that just stops without explanation.

Thursday, March 24, 2011

Time to find materials

Action has been slow since we're still in Annapolis and my build site in Maine. We plan to be in Maine with in a month so now is time to start investigating materials. My approach was to write up a letter with a materials list for the plywood, softwoods and some of the hard woods then e-mail that to several suppliers. The initial result is shopping around works! For just the 54 pieces of Okoume plywood( of 9mm, 6mm and 4mm thicknesses) with shipping resulted in an Annapolis supplier price of $6368 and a Toronto supplier of $3777, or over $2500 less! Note to other builders, always make sure to check on shipping cost for these big items, in this case one was $1896 and the other $472, and both to our Maine address. And the cheaper one is 100 miles closer and across an international boarder.

Also this is making me take a hard look at the plans and I'm finding they leave some things to the imagination of the builder. Such as on the first page the say to nail the butt joints for the hull sides using copper nails. Problem, no nails in the bill of material. Same for copper wire for the stitch and glue. Then there is a different type of issue where they say drill hole "Big enough to allow hull sides to open". Last time I checked "big enough" is not a measurement.

Oh well, not really complaining, it's all easily overcome but I can see an absolute newbie might have some anxiety.

Tuesday, March 1, 2011

On having less stuff.

I'm starting to experience a feeling that I last had about 6 years ago. 6 years ago we made our first break from the ordinary American lifestyle. But It all started 10 years before that when my father had died 6 months after retiring at the age of 60.5. He had worked hard and accumulated loads of stuff and dreamed of sailing off in his 25ton custom steel sail boat. He had been installing batteries when he died on a sunny warm October morning in Florida. We had been planing to sail the boat to Europe and mom would fly over. His death shook my world.

It took me about a year to really begin to understand what we missed. That's when I decided to leave "normal" life by age 45. Stocks were roaring so at 43 my wife and I were beginning our new life and selling the house, giving some furniture to Goodwill selling other stuff on Craigslist. I was a car/motorcycle nut. 7 years ago I had 4 cars, 3 motorcycles and a 34ft catamaran with twin inboard diesels for a family of 2.

Then one day as we sold some of that stuff I woke up and had this peaceful feeling and realized how much tension I had tied up in that stuff.  I then remembered a homily our priest had once given and in the end he had asked whether we owned our stuff or our stuff owned us? Now I knew. But I didn't get rid of everything, oh no 2 motorcycles and a car had to be kept in storage.

Well here we are years later and my life of stuff has again defied thermodynamics and increased in complexity. I was back up to 3 cars, 2 motorcycles, and a couple sailboats and wanting to build a Tiki. Something had to give. Now the Goldwing is sold and solid plans to sell the BMW and MGTD. And I've sold about 40 odd books and car/motorcycle parts and more to go. It really feels right.

Thursday, February 10, 2011

PP=PITA (PayPal is a Pain-In-The-Ass)

I’ve been reintroduced to Ebay and PayPal. I  used both of them a long time ago, back before they were one company and Meg started paying herself like a Hollywood star.  Now I’ve got new accounts to help me sell stuff to fund the Tiki project. Well the eBay half isn’t too bad, they just really don’t want you to call them. I’ve had questions that I had to spend hours digging to find an answer to when a one minute call would have done the trick. I think I know who’s time they value more. But that’s just merely annoying.

PP on the other hand is really a thief in corporate clothing. First they change 2.9% for even cash transactions. Well, OK I knew that going in so let’s move on. Over the past two months I have gotten over $4000 deposited, only half from eBay. Then PP says I can only withdraw $500/month unless I give them even more personal information, i.e. SSN or credit card. They already have access to my checking account that I’ve had for over 20 years!
So at this moment PP is holding hostage over $3k of my money and not even paying me interest. When I bitch they say “Just put in our Competitive Money Market Fund”. First, they don’t know what the word competitive means. Their MMF 0.13% compared to an NFCU-MM at 0.25% or Vanguard PMM at 2.5% as of today. Next their MMF requires my SSN to open! Little catch-22 action going on there.

Now today I get the next joyous email from the PP thieves, new money in from eBay(I think it’s only eBay) has a 21 day hold to allow the buyers time to bitch. And naturally again without paying me interest for the use of my money. My only real response is to throttle way back the amount of cash that flows through PP’s thieving hands. The USPS Money Orders are now my friend! A $500 MO costs only 0.0022%, less than 1/10 what PP wants.

Monday, January 31, 2011

Generosity of others!!!!

Sometimes reading the daily news I get somewhat depressed by the evil manifested by some people. Then someone is so kind to me that I have to reset my thinking and understand the most people, like 98%, are kind and generous. In this case it was the out of the blue delivery of a package from the man I bought my plans from, contained in that package were copies of the lashing arrangement used on the Tiki 31. I wanted these since this is one thing I still want to change i.e. the beam to deck connection. I’m not totally off in left field since the plans I have even suggest using lashing instead of straps for serious offshore work. I’m going to investigate if I can build with both methods usable. So that I could launch quickly then change to lashing at my leisure.

Monday, January 24, 2011

Really a design change? Are the cross beams OK?

Tiki 30 crossbeam
After studying the cross beams some more I think I'm comfortable with them. They appear to be an I-beam but with fairings. I believe that if I install some 6oz cloth on the lower surface extending over the vertical beam's horizontal components then the possible rot issue would be solved. In my limited wood/epoxy experience rot happens when water sits on a piece of wood that has only epoxy coating not on one with a minimal layer of cloth over it. My guess is the wood expands/contracts with heat and opens up pores. Also the end grain deserves special attention.

Saturday, January 22, 2011

Plans and modification already!!

The deal on the plans came through and straight from Southern California to my doorstep in snowy Maryland via the USPS in only 2 days! It's like Christmas in my mother-in-laws house! My mother-in-law is the greatest and let me build my CLC Passagemaker a few years ago in her garage. I’m sure if I asked she would let me take the garage once again for Tiki build, but she has a new car and I think that’s asking too much, I’ll just need to wait until we get back to our house in Maine.

I'm already thinking of changing the cross beam from the enclosed triangular design to the I-beam used on the Tiki 31. I don't like the idea of having an enclosed space for potential rot on such a structurally important item.
Next is the beam to hull attachment, the standard plans use webbing allot like a car seat belt. But the plans talk about using a lashing arrangement for offshore work. I'll need to get my hands on some plans for that mod.

Friday, January 21, 2011

What makes me think I can build a Tiki 30?

That's a question I've asked myself many many times over the past few months. It's not like I'm big time wood worker, building chairs, cabinets and the like. I mess around with wood working and have a few tools that a serious wood worker would either laugh at or cringe.

My confidence comes really from having built a Chesapeake Light Craft Passagemaker 12-ft sailing dinghy which was built with the same method as the Tiki, that is Stitch and Glue. I think of these kind of boats not so much as wooden boats as fiberglass boats with a wood core. Built from the core out.

I think the biggest challenge will not be the technical issues, but the motivation over a long period. The CLC dinghy took a year and a half(the build is detailed on my other website www.3ddev.com/tschuss under Our Small Boats), but that represented only about 130 man-hours. I had other projects at the time, fixing up a house to sell for one, but I also know that dragging my ass out to the garage in less than perfect weather was tough. And in perfect weather I wanted to go sailing or biking. But then I had a large sailboat, now the Tiki is to be the sailboat.

So I'm hoping that this blog and some feedback will help keep me on track! So thanks in advance for any comment. Oh and my goal is to have Rubicon(current name, but I'm pondering other meaningful possible names) ready to sail in the same time the CLC took. So I only need to up my production by a factor of 10 :)

I've decided that May 1, 2011 will be the official start of construction! By that date we should have been in Maine at our Dome house for at least a month giving me a good start on house construction before getting sidetracked.

Wednesday, January 19, 2011

Why we choose the Tiki 30..

We sold our last catamaran a Heavenly Twins 26, because it didn't fit a couple criteria once we bought our dome house in Maine. First I had for many years said I would not own a boat so large that it "had" to be in a marina or mooring if we were not living aboard full time. I have just seen too many big beautiful boats, Cobo Rico 38s, Tayana 37s, Masons, Albergs, Pacific Seacrafts, on and on, that sit in their slips for years on end with only a weekend or two underway. I can't understand the motivation to own such boats and never use them. If marinas were required to put ashore any boat that doesn't get underway a least twice annually I think there most would be at least half empty.

With that idea in mind the HT was out. At nearly 14-ft beam, any overland transport was going to be too costly requiring permits, front and back escorts, and not fit down our driveway.

So our requirements for a new boat were...
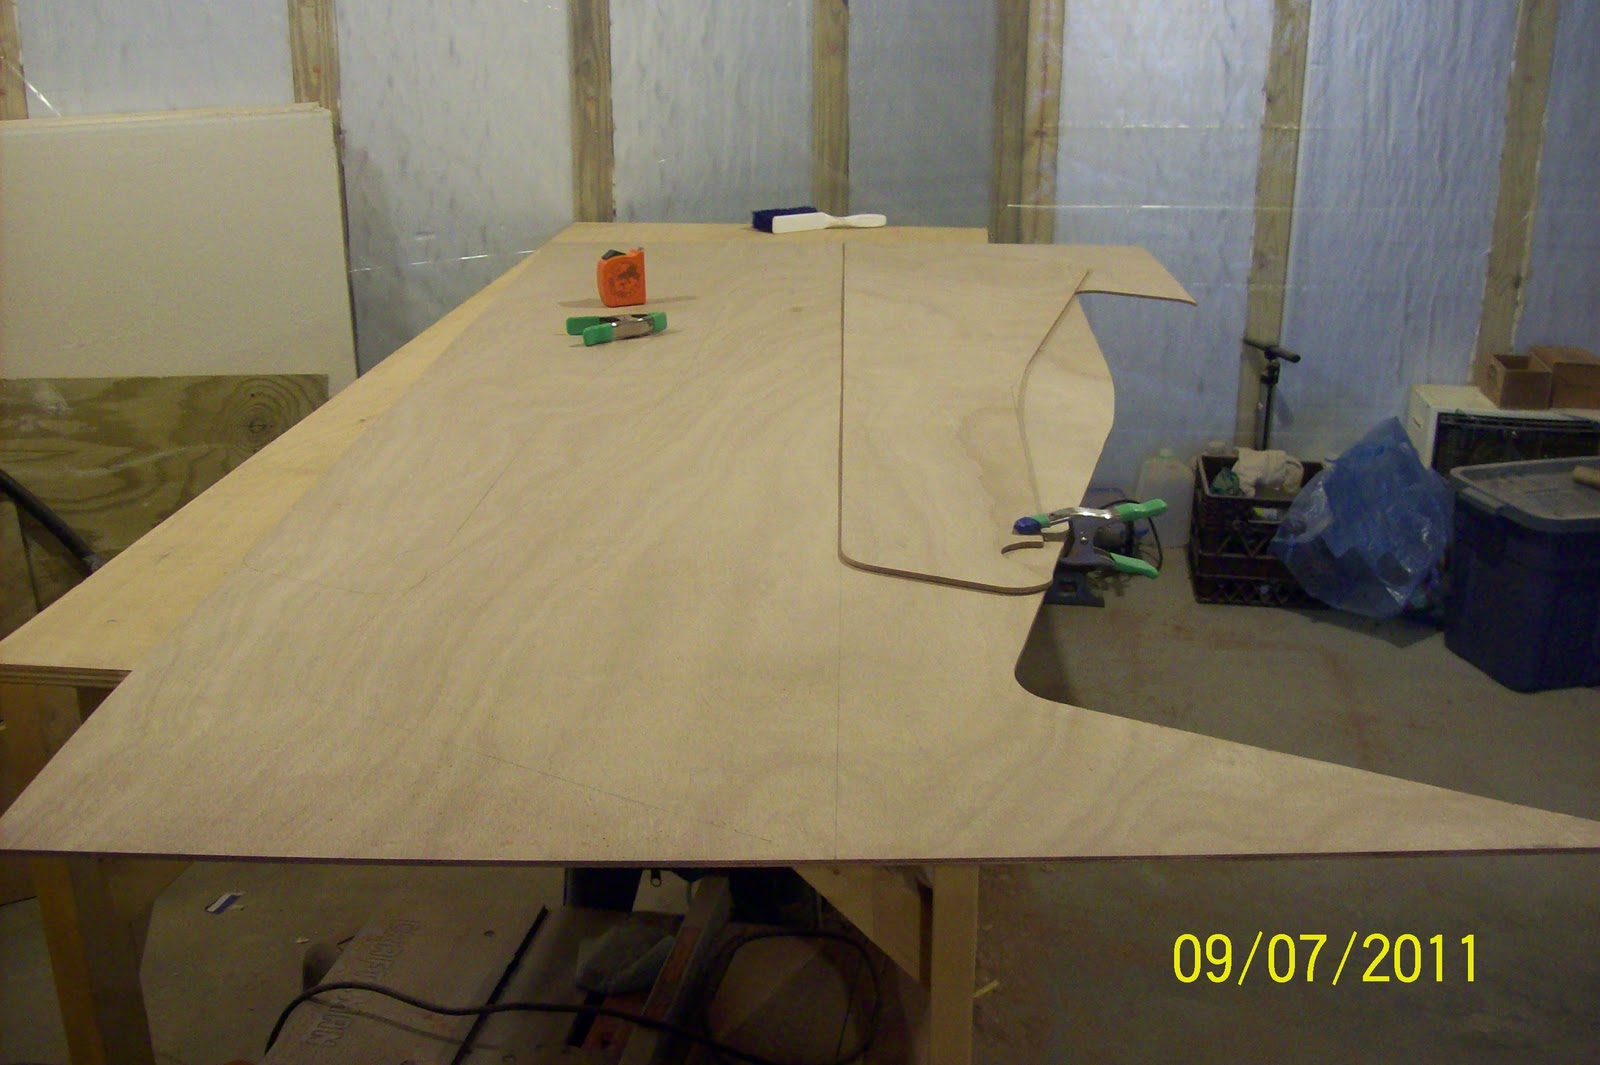
    •    It must either be or capable of being disassembled to trailer behind our F250 pickup i.e. less than 12500lbs trailer weight and under 8ft 6in wide. Tiki 30 is under 3000lbs with trailer and can be broken down to transport on a 8-ft wide trailer.
    •    We love shoal draft, so less than 3ft would be very nice. Tiki 30 is 2-ft 1-inch, even loaded under 2.5-ft
    •    We love the way catamarans ride, sailing on my ear as they say, is fun for an afternoon but tiring any longer. Tiki 30 is a catamaran!
    •    Something with proven blue ocean capability in the proper hands. Yes, even Tiki 21's have sailed the world.
    •    Something small enough for me to solo, but big enough for both of us. I Love my wife therefor the boat HAS to have at least one double bunk. Tiki 30 can be built with two. Tiki low weight and sail area make me very confident I can handle her alone.
    •    Simple, the less complexity the fewer failures and lower expenses.
    •    The solo and simple then required a total displacement under 4 tons, total sail area under 400 sq-ft. Tiki 30 working sail area is 385 sq-ft
    •    Can carry two tons without too adversely effecting sailing performance. Tiki 30 marginal here.
    •    And last but certainly not least, she must look good to my eye! All of Wharrams designs satisfy this need!
Well you see where I'm going small and simple but can carry two tons. I couldn't have everything and the Tiki meets  all but the cargo carrying. It's listed as carrying up to a ton but as I understand the displacement number doesn't include many things that us westerners consider normal, so the real load ability is maybe 1/2 ton.

We've lived on catamarans for years and have learned to keep things light, and even so every time we've sold the boat I was shocked at how much junk can accumulate. We'll just need to be more diligent this time around.

"Look deep into nature, and then you will understand everything better." ~ Albert Einstein

Tuesday, January 18, 2011

Collecting cash to get started!

Still under the Per-build, accumulating money to get started. I've listed 356C Porsche items on e-bay and the 356Registray.com and have gotten pretty good results so far about $2500, of course it's not real until the cash is in hand:) Also my west coast contact for a set of TIki 30 plans appears to have vanished:( Guess I'll need to pay list as I'm getting antsy to see the plans and begin sketching out my changes.

Sunday, January 16, 2011

The Pre-build has begun.

Hi, I plan to document the building of a Wharram Tiki 30 catamaran here. Just a few days ago my wife and I did the high-five and agreed to the build. We have lived aboard a Catalac 10m and Heavenly Twins 26', both catamarans since 2005. The Catalac was a condocat and sailed like it. The HT was much better but still had a hull beam to water line length ratio too low( under 1:12) so she still could not sail faster than the wave length limit. But they were both good full time live aboard boats. Now that we have a home ashore again, we,I, decided a boat more sailing performance is what we want. I've admired the Wharram boats for many years and the opportunity to sail a pro-built Tiki 30 in Jupiter Fl a week ago sold us.

The first pre-build steps are to get plans and get cash. On the first I'm in contact with a guy in California for plans, he's decided to build a Tiki 26. On the 2nd point we've begun selling stuff we no longer need. I'm selling Porsche 356, 911 parts, manuals, a 2002 Goldwing GL1800A, a 1966 BMW R69S, and a 1991 MacGregor 26S. I figure that if I get a decent price for this stuff the Tiki 30 materials should be covered! So today I placed three items on eBay and one on the 356Registry.
This is a photo of the beautiful  Tiki 30 built by BoatSmith of Jupiter Fl